برای تست اولیه fast api کافیست در پوشه پروژه خود یک فایل main.py ایجاد کرده و محتوایت زیر را قرار دهید:
from fastapi import FastAPI

app = FastAPI()


@app.get("/")
def hello_world():
    return {"message": "Hello World"}
استفاده از FastAPI CLI
برای راه اندازی ساده و سریع سرویس می توانید با استفاده از رهبرد های Fastapi-cli به اجرای پروژه بپردازید که به شکل زیر خواهد بود:
fastapi dev main.py
که در نهایت خروجی زیر را در بر خواهد داشت:
INFO     Using path main.py
INFO     Resolved absolute path
         C:\Users\Ali\Documents\GitHub\FastAPI-Tutorial-Service\core\main.py
INFO     Searching for package file structure from directories with __init__.py files
INFO     Importing from C:\Users\Ali\Documents\GitHub\FastAPI-Tutorial-Service\core

 ╭─ Python module file ─╮
 │                      │
 │  🐍 main.py          │
 │                      │
 ╰──────────────────────╯

INFO     Importing module main
INFO     Found importable FastAPI app

 ╭─ Importable FastAPI app ─╮
 │                          │
 │  from main import app    │
 │                          │
 ╰──────────────────────────╯

INFO     Using import string main:app

 ╭────────── FastAPI CLI - Development mode ───────────╮
 │                                                     │
 │  Serving at: http://127.0.0.1:8000                  │
 │                                                     │
 │  API docs: http://127.0.0.1:8000/docs               │
 │                                                     │
 │  Running in development mode, for production use:   │
 │                                                     │
 │  fastapi run                                        │
 │                                                     │
 ╰─────────────────────────────────────────────────────╯

INFO:     Will watch for changes in these directories: ['C:\\Users\\Ali\\Documents\\GitHub\\FastAPI-Tutorial-Service\\core']
INFO:     Uvicorn running on http://127.0.0.1:8000 (Press CTRL+C to quit)
INFO:     Started reloader process [11252] using WatchFiles
INFO:     Started server process [10076]
TP/1.1" 200 OK
استفاده از Uvicorn
برای راه اندازی سرور و دسترسی به اپلیکیشن کافیست در پوشه پروژه و جایی که فایل main قرار دارد در ترمینال خود دستور زیر را وارد نمایید:
uvicorn main:app --reload
با این کار اپلیکیشن شما در حالت اجرا و در وضعیت پوش کردن به تغییرات می ماند و با هر بار تغییر در کد و ذخیره سازی آن سرور به صورت خودکار باز نشانی خواهد شد.
می توانید تمام آپشن های اجرایی uvicorn را در زیر مشاهده نمایید:
$ uvicorn --help
Usage: uvicorn [OPTIONS] APP

Options:
  --host TEXT                     Bind socket to this host.  [default:
                                  127.0.0.1]
  --port INTEGER                  Bind socket to this port. If 0, an available
                                  port will be picked.  [default: 8000]
  --uds TEXT                      Bind to a UNIX domain socket.
  --fd INTEGER                    Bind to socket from this file descriptor.
  --reload                        Enable auto-reload.
  --reload-dir PATH               Set reload directories explicitly, instead
                                  of using the current working directory.
  --reload-include TEXT           Set glob patterns to include while watching
                                  for files. Includes '*.py' by default; these
                                  defaults can be overridden with `--reload-
                                  exclude`. This option has no effect unless
                                  watchfiles is installed.
  --reload-exclude TEXT           Set glob patterns to exclude while watching
                                  for files. Includes '.*, .py[cod], .sw.*,
                                  ~*' by default; these defaults can be
                                  overridden with `--reload-include`. This
                                  option has no effect unless watchfiles is
                                  installed.
  --reload-delay FLOAT            Delay between previous and next check if
                                  application needs to be. Defaults to 0.25s.
                                  [default: 0.25]
  --workers INTEGER               Number of worker processes. Defaults to the
                                  $WEB_CONCURRENCY environment variable if
                                  available, or 1. Not valid with --reload.
  --loop [auto|asyncio|uvloop]    Event loop implementation.  [default: auto]
  --http [auto|h11|httptools]     HTTP protocol implementation.  [default:
                                  auto]
  --ws [auto|none|websockets|wsproto]
                                  WebSocket protocol implementation.
                                  [default: auto]
  --ws-max-size INTEGER           WebSocket max size message in bytes
                                  [default: 16777216]
  --ws-max-queue INTEGER          The maximum length of the WebSocket message
                                  queue.  [default: 32]
  --ws-ping-interval FLOAT        WebSocket ping interval in seconds.
                                  [default: 20.0]
  --ws-ping-timeout FLOAT         WebSocket ping timeout in seconds.
                                  [default: 20.0]
  --ws-per-message-deflate BOOLEAN
                                  WebSocket per-message-deflate compression
                                  [default: True]
  --lifespan [auto|on|off]        Lifespan implementation.  [default: auto]
  --interface [auto|asgi3|asgi2|wsgi]
                                  Select ASGI3, ASGI2, or WSGI as the
                                  application interface.  [default: auto]
  --env-file PATH                 Environment configuration file.
  --log-config PATH               Logging configuration file. Supported
                                  formats: .ini, .json, .yaml.
  --log-level [critical|error|warning|info|debug|trace]
                                  Log level. [default: info]
  --access-log / --no-access-log  Enable/Disable access log.
  --use-colors / --no-use-colors  Enable/Disable colorized logging.
  --proxy-headers / --no-proxy-headers
                                  Enable/Disable X-Forwarded-Proto,
                                  X-Forwarded-For, X-Forwarded-Port to
                                  populate remote address info.
  --server-header / --no-server-header
                                  Enable/Disable default Server header.
  --date-header / --no-date-header
                                  Enable/Disable default Date header.
  --forwarded-allow-ips TEXT      Comma separated list of IPs to trust with
                                  proxy headers. Defaults to the
                                  $FORWARDED_ALLOW_IPS environment variable if
                                  available, or '127.0.0.1'.
  --root-path TEXT                Set the ASGI 'root_path' for applications
                                  submounted below a given URL path.
  --limit-concurrency INTEGER     Maximum number of concurrent connections or
                                  tasks to allow, before issuing HTTP 503
                                  responses.
  --backlog INTEGER               Maximum number of connections to hold in
                                  backlog
  --limit-max-requests INTEGER    Maximum number of requests to service before
                                  terminating the process.
  --timeout-keep-alive INTEGER    Close Keep-Alive connections if no new data
                                  is received within this timeout.  [default:
                                  5]
  --timeout-graceful-shutdown INTEGER
                                  Maximum number of seconds to wait for
                                  graceful shutdown.
  --ssl-keyfile TEXT              SSL key file
  --ssl-certfile TEXT             SSL certificate file
  --ssl-keyfile-password TEXT     SSL keyfile password
  --ssl-version INTEGER           SSL version to use (see stdlib ssl module's)
                                  [default: 17]
  --ssl-cert-reqs INTEGER         Whether client certificate is required (see
                                  stdlib ssl module's)  [default: 0]
  --ssl-ca-certs TEXT             CA certificates file
  --ssl-ciphers TEXT              Ciphers to use (see stdlib ssl module's)
                                  [default: TLSv1]
  --header TEXT                   Specify custom default HTTP response headers
                                  as a Name:Value pair
  --version                       Display the uvicorn version and exit.
  --app-dir TEXT                  Look for APP in the specified directory, by
                                  adding this to the PYTHONPATH. Defaults to
                                  the current working directory.
  --h11-max-incomplete-event-size INTEGER
                                  For h11, the maximum number of bytes to
                                  buffer of an incomplete event.
  --factory                       Treat APP as an application factory, i.e. a
                                  () -> <ASGI app> callable.
  --help                          Show this message and exit.
در صورتی که مایل به اجرای سرور از داخل کد هستید می توانید به روش زیر عمل کنین
import uvicorn


if __name__ == "__main__":
    uvicorn.run("main:app", port=8000, log_level="info")
در نهایت با خروجی زیر رو به رو خواهید شد:
$ uvicorn main:app --reload
INFO:     Will watch for changes in these directories: ['C:\\Users\\Ali\\Desktop\\fastapi-tutorial']
INFO:     Uvicorn running on http://127.0.0.1:8000 (Press CTRL+C to quit)
INFO:     Started reloader process [34368] using WatchFiles
INFO:     Started server process [31124]
INFO:     Waiting for application startup.
INFO:     Application startup complete.
INFO:     127.0.0.1:54082 - "GET / HTTP/1.1" 200 OK
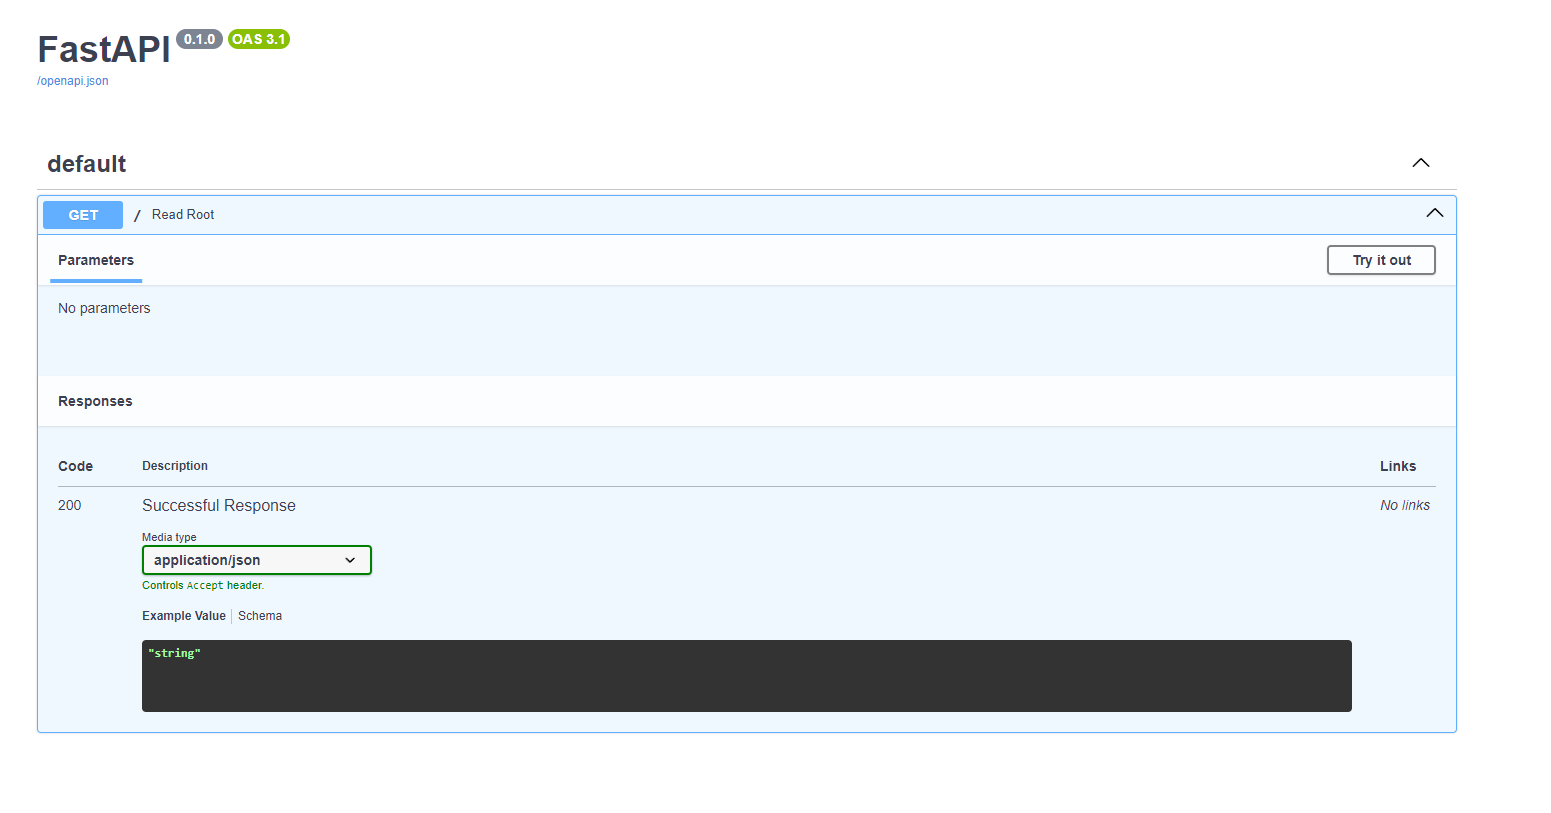
از ویژگی های منحصر به فرد fastapi ایجاد داکیومنت خودکار مبتنی بر open api 3 و swagger است که می توانید همیشه از آدرس زیر به آن دسترسی داشته باشید:
http://127.0.0.1:8000/docs
پس از ورود به این آدرس با صفحه زیر مواجه خواهید شد که لیستی از تمام endpoint ها و آدرس هایی که ایجاد خواهید کرد را در آن مشاهده می کنید

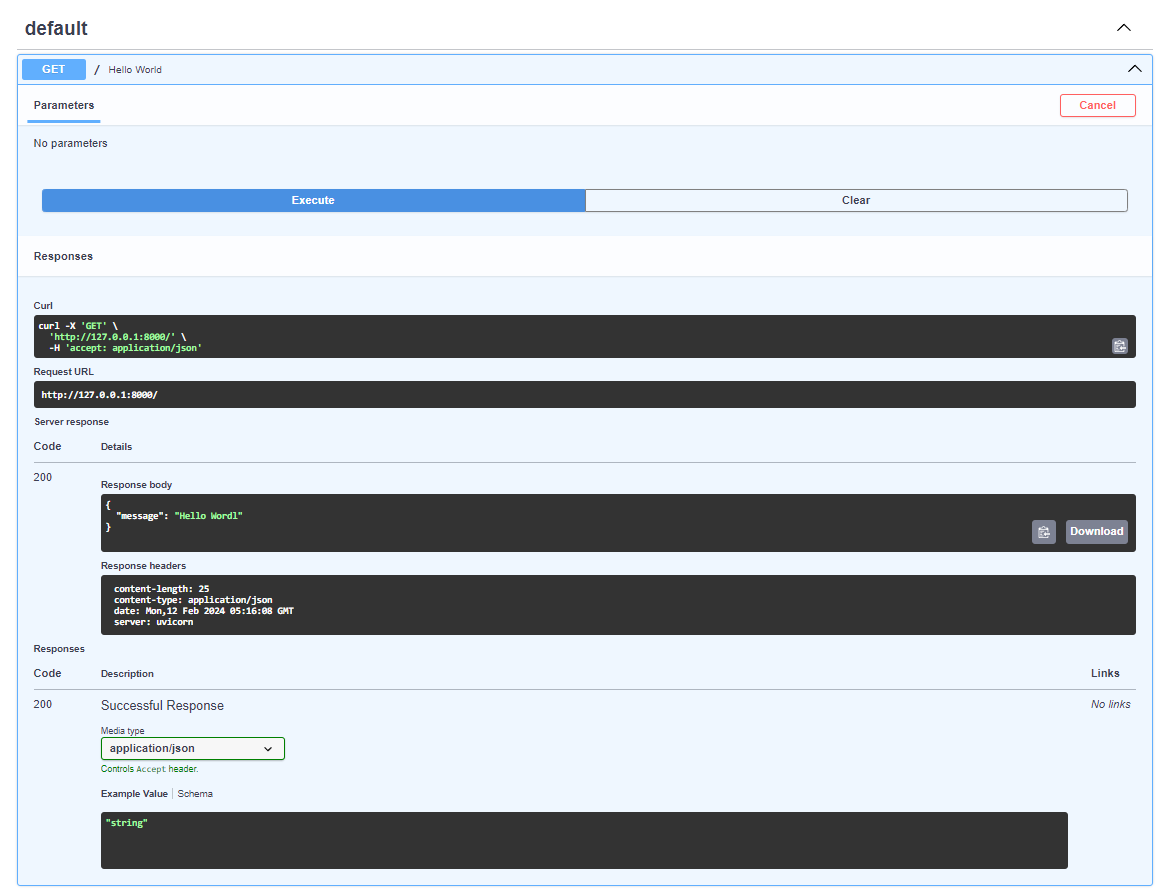
در هر مرحله شما می توانید برای تست عملکرد هر endpoint ابتدا آن را در وضعیت tryout قرار دهید
و سپس با execute کردن عملکرد متناسب با endpoint مربوطه را تست نمایید.
